How to Set Up an Automatic Screw Feeder and Driver | Industrial Automation Guide
| Product Name | Applicable industries |
| CNC Screw Fastener | Home Appliance Production |
Automation has revolutionized modern manufacturing, and one of the most essential tools in industrial production lines is the automatic screw feeder and driver. This system significantly enhances efficiency, precision, and productivity by eliminating manual screw placement and tightening. If you're looking to integrate this technology into your workflow, here’s a step-by-step guide on how to set up an automatic screw feeder and driver.
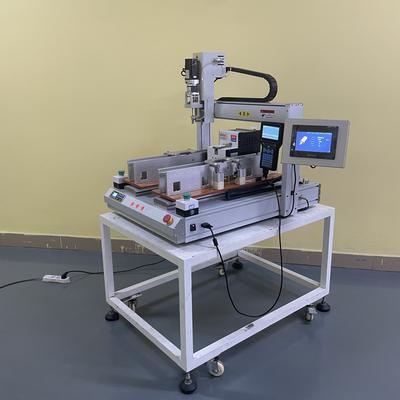
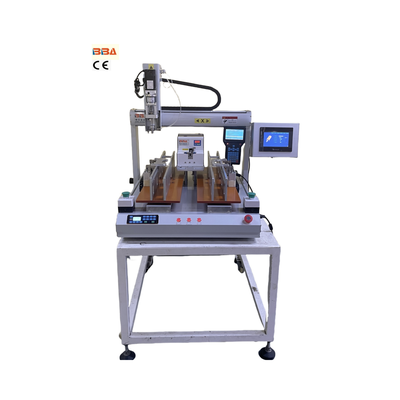
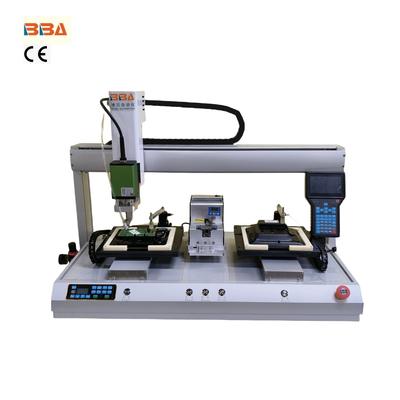
1. Choose the Right Equipment
Before installation, ensure you have the correct automatic screw feeder and driver for your specific application. Consider factors such as screw size, material, feed rate, and torque requirements. The feeder bowl, driver, and controller should be compatible with your production needs to ensure smooth operation.
2. Prepare the Workspace
Clear the installation area of any clutter and ensure a stable surface for mounting the equipment. The feeder bowl should be positioned close to the assembly line for easy screw delivery. Verify that power and compressed air sources (if applicable) are readily accessible.
3. Assemble the Screw Feeder Bowl
Mount the feeder bowl securely on a vibration-resistant base to minimize noise and improve stability. Adjust the bowl’s track to align with the screwdriver’s pickup point. Load the screws into the bowl and run a test cycle to ensure smooth feeding without jams.
4. Connect the Screwdriver
Attach the automatic screwdriver to the feeder system, ensuring the pickup nozzle aligns with the end of the feeder track. Tighten all connections to prevent misalignment during operation. If the system is electric or pneumatic, connect it to the appropriate power or air supply.
5. Configure the Controller
Set the screwdriver’s torque and speed settings according to the screw specifications. Adjust the feeder’s timing to synchronize with the driver’s operation. Many systems include a programmable logic controller (PLC) for fine-tuning the process, ensuring consistent performance.
6. Test and Calibrate
Run a series of test cycles to verify the system's accuracy and reliability. Check for misfeeds, incorrect torque application, or any mechanical issues. Make necessary adjustments to the track, driver position, or controller settings to optimize performance.
7. Operator Training and Safety
Train operators on proper system usage, including loading screws, starting cycles, and troubleshooting common issues. Emphasize safety protocols such as wearing protective gear and keeping hands clear of moving parts during operation.
8. Maintenance and Troubleshooting
Regularly inspect the feeder bowl, tracks, and screwdriver for wear and tear. Clean the system to prevent debris buildup, which can cause jams. Keep a log of performance metrics to identify any recurring issues and schedule preventive maintenance.
By following these steps, you can successfully set up an automatic screw feeder and driver to streamline your manufacturing processes. This investment in automation improves consistency, reduces labor costs, and enhances overall production efficiency.